Base Building
Permafrost Base Building Guide (2026) – Shelter, Layout & Design
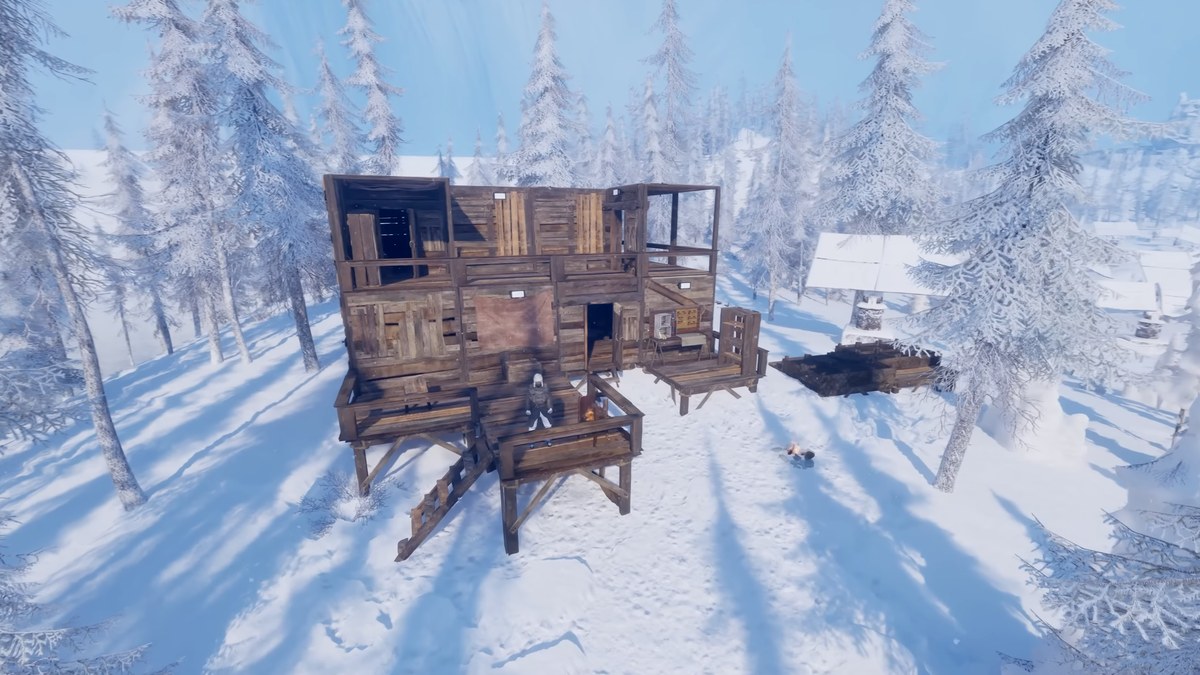
Your base is the difference between surviving Permafrost and simply dying more slowly. In a world of permanent ice and lethal storms, a well-chosen location, a properly sealed shelter and a smart interior layout transform survival from a desperate scramble into a deliberate, manageable game. This Permafrost base building guide covers every decision point: how to find and evaluate the best base location in the frozen world, which structures to build and in what order, how to maximise warmth inside your Permafrost shelter, three recommended layout templates from solo to four-player, advanced techniques for long-term base design, and how to defend your camp against wildlife and the cold. Whether you're placing your first campfire or planning a permanent multi-room stronghold, this guide gives you the blueprint. New players should read our Permafrost beginner's guide first for survival fundamentals.
Choosing the Right Base Location
Every hour you spend in a poorly chosen location costs you in fuel, warmth and time. Before placing your first wall, evaluate any potential site against these five factors:
- Wind shelter. Wind is the primary multiplier on heat loss in Permafrost. A site with a natural rock face, cliff wall or dense tree line on its windward side blocks the worst of the wind without requiring you to build against it. Structures in a sheltered valley or behind a ridge can be noticeably warmer than open-plain equivalents even with identical heating. This is your most important siting criterion — prioritise it above everything else.
- Proximity to resources. You will make hundreds of gathering runs from your base over the course of a playthrough. A site within close range of a forest cluster for Frost Timber and Dry Grass dramatically reduces the cold exposure cost of every gathering trip. Ideally, your most-used resource — wood — should be reachable in a short run that keeps your temperature manageable.
- Water access. Snow is drinkable water waiting to be melted, and it's everywhere — but you still need to carry it back. Siting near a dense snow bank or a frozen water body shortens your water runs and keeps your canteen full without major trips. Long-term, this convenience compounds enormously.
- Terrain defensibility. Natural barriers — a rock face at your back, a cliff edge on one flank, a steep slope on another — reduce the directions threats can approach from. A base that forces wildlife and potential hazards to approach from one direction is far easier to defend than one exposed on all sides. Building against a ruin wall gives you a similar advantage with less material cost.
- Room to expand. Your first shelter is small. Your eventual base will be substantially larger. Choose a site with enough flat, clear ground around it to accommodate future rooms, storage buildings, a perimeter fence and a watchtower without hitting terrain obstacles. A tight alcove may be warm and defensible, but if there's no room to grow, you'll be dismantling and rebuilding sooner than expected.
Essential Base Structures
These fourteen structures form the complete toolkit for a functional Permafrost base from early camp to fortified stronghold. Build them in the order that matches your current tier of materials. The first five are your absolute minimum for a safe first night; everything else layers on as resources allow.
| Structure | Materials Required | Function |
|---|---|---|
| Wooden Wall | 6× Frost Timber, 2× Plant Fiber | Basic windbreak and enclosure; blocks heat loss and limits wildlife access |
| Thatch Roof | 5× Frost Timber, 4× Dry Grass | Seals the interior from wind and snowfall; required to complete a warming enclosure |
| Wooden Door | 4× Frost Timber, 2× Sinew | Controlled entry point; keeps heat in and threats out when closed |
| Wooden Floor | 4× Frost Timber | Insulates against ground-level cold penetration; raises effective interior warmth rating |
| Stone Firepit | 8× Flint Stone, 4× Frost Timber | Permanent indoor heat source; significantly more fuel-efficient than an open campfire |
| Reinforced Wall | 8× Frost Timber, 2× Scrap Iron | Greater structural durability; resists wildlife damage and blizzard stress better than wood |
| Reinforced Door | 6× Frost Timber, 2× Scrap Iron | Sturdier entry point; significantly resists forced entry by larger wildlife |
| Storage Chest | 6× Frost Timber, 2× Sinew | Dedicated material organisation; prevents supply confusion and wasted gathering trips |
| Crafting Bench | 10× Frost Timber, 4× Scrap Iron, 4× Sinew | Unlocks mid and advanced crafting recipes; the most critical early workstation |
| Cooking Station | 6× Frost Timber, 4× Flint Stone | Processes raw meat safely; enables food preservation; more efficient than campfire cooking |
| Bed | 5× Frost Timber, 3× Frozen Hide | Rest point; restores warmth, hunger and stamina simultaneously overnight |
| Perimeter Fence | 4× Frost Timber (per segment) | Channels approaching wildlife toward a single controlled entry point; passive perimeter defense |
| Watchtower | 8× Frost Timber, 4× Sinew | Elevated observation point; extends threat detection range and gives ranged weapon advantage |
| Smoking Rack | 6× Frost Timber, 2× Sinew, 2× Flint Stone | Preserves meat for long-term storage; prevents spoilage during extended blizzard lockdowns |
Warmth Optimization – How to Keep Your Base Warm
A base that leaks heat is a base that wastes fuel. Every unit of warmth your fire generates that escapes through a gap in your walls is fuel you gathered, carried and burned for no benefit. Warmth optimization is about ensuring the heat your fire produces stays inside your shelter and works for you.
Sealing the envelope. Your shelter's warmth is only as good as its weakest gap. Walls alone don't seal a base — you also need a complete roof, a floor, and a door that stays closed. An open doorway during a blizzard can drain interior heat nearly as fast as your fire can restore it. Walk your base perimeter mentally before every storm: wall connected, roof complete, door shut. A perfectly sealed interior holds warmth long after the fire burns low.
Central heat source placement. A fire placed against one wall warms one half of your base effectively and leaves the other half cold. A centrally positioned Stone Firepit radiates warmth in all directions, heating your crafting area, rest area and storage in a single coverage zone. In a larger base, consider two heat sources — one central, one against the far wall — to eliminate cold pockets. Warmth dead-zones in a base are where stamina regeneration stalls and frostbite can creep in even indoors.
Floor insulation. Ground-level cold is often overlooked. Without a Wooden Floor layer, cold penetrates up through the base of your shelter continuously, requiring your fire to work harder to compensate. A floor is cheap in materials and pays back its cost in fuel savings across every night you sleep in the base. Build it before you add a second wall.
Fuel reserve discipline. Warmth optimization is also a logistics problem. A perfectly designed base with a cold fire is simply a cold shelter. Maintain a minimum of 30 units of Frost Timber specifically designated as fire fuel at all times, separate from your general wood stockpile. Top it up every time you return from gathering — never wait until you're burning the last logs at 2am in a blizzard.
Recommended Base Layouts
These three layout templates cover the most common Permafrost situations. Each is designed to maximise warmth efficiency for its scale, minimise wasted material and keep the most-used items within reach of the heat source. Use these as starting points and adapt them to your terrain.
Solo – Compact Warm Cell
A 3×3 interior with everything essential within two steps of the firepit. Designed for one player who needs to be warm, fed and crafting with minimal material investment.
F = Stone Firepit | B = Crafting Bench | C = Cooking Station | S = Storage | R = Bed (Rest) | D = Door
Two-Player – Standard Base
A 4×4 interior with space for two beds and a small separation between the crafting zone and rest zone. The firepit remains central to heat both halves. A second storage chest handles the doubled material throughput.
F = Firepit (centred) | B = Crafting Bench | C = Cooking | S = Storage | R = Bed | W = Workbench overflow | D = Door
Four-Player – Large Camp
A 5×5 or larger compound with a dedicated crafting wing, two firepits for even heat distribution, four beds in a separate rest room, and a storage block adjacent to the second door for returning gatherers to deposit materials without crossing the whole base. The two-door design allows a second, alarmed or fenced entry for co-op teammates.
F1/F2 = Firepits | B = Crafting Bench | G = Forge | C = Cooking/Smoking | S = Storage | R = Bed | D = Door (×2)
Advanced Base Building Tips
Once you have a warm, functional base running, these five techniques push your build significantly further — reducing long-term costs, improving resilience and setting you up for expansion without starting over.
- Build double-layer walls on your windward side. A second wall layer on the face your base takes the most wind from creates an air gap that meaningfully improves insulation, reducing the heat loss rate inside. This is particularly effective on bases built in partially exposed terrain where a natural rock face doesn't cover all your flanks. The material cost is modest compared to the fuel savings over a long storm cycle.
- Position storage at the entry point, not the back of the base. The most common base layout mistake is putting storage deep inside — which means every returning gatherer carries materials across the whole floor before depositing them. Place your storage chests immediately inside the door so you can deposit and get warm in one movement. In co-op, this also means teammates don't interrupt each other's crafting or rest to access the stockpile.
- Plan your expansion direction before you place your first wall. Know which direction you'll add your next room — crafting wing, additional storage or sleeping quarters — before you build the initial shell. Walls placed without a plan often end up blocking expansion in exactly the direction you later need. Leave one wall of your initial structure buildable-through rather than backed against terrain.
- Install a second heat source as a backup before you need it. A single fire is a single point of failure. If it goes out mid-storm while you're asleep, you wake up to a freezing base and an emergency. A second Stone Firepit on the opposite side of your shelter, kept fuelled, means one going out is an inconvenience. Two going out simultaneously is near-impossible under normal conditions.
- Mark your base with a visible external landmark. In heavy snow or a whiteout, a base looks identical to every other snow-covered structure. Place a distinctive marker — a tall wooden post, a lit torch, a unique material arrangement — visible from the directions you approach from most often. Returning home safely from a blizzard depends on being able to find your base when you can't see more than a few meters ahead.
Defending Your Base
Your base faces two categories of threat: the environment and wildlife. Environmental defense is primarily an insulation and fuel problem — a properly sealed, well-heated base already survives the worst blizzards without active intervention. Wildlife defense requires deliberate structural choices from the moment you start building.
The most effective defensive structure is the single controlled entrance. A base with one reinforced door and walls that leave no other gap forces any approaching threat to come through the one point you're watching. A Perimeter Fence extending from your base walls channels wildlife toward that entrance rather than allowing them to probe every side simultaneously. Your dog companion stationed near the entrance provides the earliest possible alert when anything approaches, giving you time to arm and position before contact.
Keep a repaired weapon within immediate reach of your door at all times. Not stored in a chest — reachable. A weapon you have to unpack is a weapon you'll be missing when you need it in seconds. Building on a naturally defensible site — a rock face at your back, terrain obstacles on your flanks — is passive defense that compounds with every structural upgrade you add. The best defended base is one where threats have almost no viable approach angle to begin with.
⚡ 5 Key Base Building Tips
- Seal the roof before you light the fire. An open-roof structure with a fire running is just heating the sky. Complete the enclosure first, then ignite your permanent heat source.
- Build a floor early, not late. Ground-cold penetration is invisible but constant. A Wooden Floor costs almost nothing and eliminates one of the quieter warmth drains in the game.
- Keep 30 units of fuel reserved at all times. Not as part of your general wood supply — physically separate, dedicated fire fuel. This is your blizzard insurance policy.
- One door, reinforced. Multiple entrances are multiple weak points. A single Reinforced Door with a fence channelling approaches to it is your most cost-effective defensive investment.
- Build near a forest, not inside one. Trees block wind, but dense woodland also blocks visibility and gives wildlife easy cover to approach unseen. Position at the forest edge for the best of both.
⚠ 3 Common Base Building Mistakes
- Building large before building warm. A sprawling base with no heat source installed is just an expensive open-air freezer. Always complete a sealed, heated core room before expanding outward. One warm small room is worth more than five cold large ones.
- Stockpiling fuel inside the base walls with no backup reserve. Players routinely burn through their entire fuel stockpile in a single long blizzard and wake up to an empty fire and a freezing shelter. Always maintain a separately designated emergency reserve — never let your fuel run to zero.
- Placing workstations at the far end of the base from the heat source. Crafting while cold accelerates your temperature loss. A crafting bench on the opposite side of your base from the firepit means every crafting session slowly freezes you. Position all workstations within the heat radius of your primary fire source.
Base Building FAQs
Where is the best place to build a base in Permafrost?
The ideal base location combines wind protection from a natural rock face or dense terrain, close proximity to a tree cluster for Frost Timber, and access to snow or a frozen water body. Avoid exposed plains and elevated ridgelines — the wind chill cost of building there outweighs any other advantage the spot might offer. A sheltered valley position with a rock face to the north gives you the best combination of passive wind shelter, easy forest access, and natural defensive advantage on your most exposed side.
How do I keep my base warm during blizzards?
Seal every wall gap, keep your Stone Firepit running continuously, and maintain a fuel reserve of at least 30 units before any storm arrives. A fully enclosed, floored base with a centrally placed heat source handles blizzards without difficulty. Adding a secondary heat source on the opposite side of the shelter provides critical redundancy if your primary fire goes out mid-storm. Never rely on an open campfire as your main blizzard heat source — wind directly outside your walls neutralises most of its warmth output. See our Permafrost survival tips for full blizzard survival strategy.
Can I move my base in Permafrost?
Yes, but there is no single relocate button. Moving means dismantling your existing structures to recover materials and rebuilding at the new site. Early wood structures typically return most of their materials on demolition; advanced components may lose a percentage. Plan your original location carefully using the five criteria above to avoid the cost of a full move. If you do relocate, prioritise recovering your Crafting Bench, Forge and stockpiled rare materials first — these are the hardest items to replace quickly at a new site.